Monday, February 13, 2012

Valentine's Suggestion #2: Pan Seared Rib Eyes

You could head to a local steakhouse, wait two hours for a table and pay $80 for a steak dinner on Valentine's Day just for the "experience" (and what an experience it is, when you both get home at midnight on a work day, tired, tipsy and broke) - or, you could enjoy one at home and impress your lov-ah all with an outstanding pan-seared rib eye. Serve with whatever steak house sides you like, and set the DVR for Teen Mom 2; I know it's the finale, but you can watch it tomorrow.

Valentine's Day Rib Eye Steaks

- 3 tablespoons butter
- 3 tablespoons olive oil
- (2) 8 oz. rib eye steaks
- Montreal steak seasoning to coat (I know this is a blog about cooking from scratch, but let's face it, no one wants to combine all the peppercorns, kosher salt, coriander and garlic powder on their own)

Directions:

Heat butter and olive oil in a skillet over medium high heat. Generously coat both sides of the steaks with the seasoning. Place one steak directly on top of the heated butter/oil in skillet. Cook in skillet for 3-5 minutes per side (3 for rare, 4 for medium rare and 5 for well done). If too rare, drizzle more oil in skillet and sear for another minute per side. Repeat process with second steak.

Let's face it, most men would prefer a steak to pasta or seafood on Valentine's Day. If yours does, impress the pants off him (yup, obviously that's literal!) with these Valentine's Day rib eye steaks.

Saturday, February 11, 2012

Valentine's Suggestion #1: Chicken Parmesan

It's a thought, right? A single candle gracing your red and white checkered tablecloth, a bottle of red wine between you and something mood-enhancing cranking from the iPod - Sinatra, maybe? If a homemade Valentine's Day is in the cards this week, consider putting chicken parm on your short list.

I have to ask: When did we start calling it "chicken parm," anyway? I would blame Giada, but I'm not sure it was her. Was it Top Chef? Probably. It's always Top Chef.  

Chicken Parmesan 

4 boneless chicken breasts, pounded to 1/2 inch thickness
1 egg
1/2 cup milk
1 cup bread crumbs (Italian seasoned)
1/2 cup Parmesan cheese
1/4 cup olive oil
2 cups mozzarella cheese
12 oz. tomato sauce
8 oz. tomato paste
2 tbs. Italian seasoning
1 tsp. seasoned salt

Whisk together the egg and milk. Combine the breadcrumbs and Parmesan cheese. Dip the chicken breasts in the milk and egg mixture, and then dredge in the bread crumb and Parmesan mixture. Heat the olive oil in a large skillet over medium-high heat. Brown the chicken in the hot oil on both sides until golden, about 4 minutes on each side. Set chicken in a baking dish or casserole.

In a small mixing bowl, combine tomato sauce, tomato paste, Italian seasoning and seasoned salt. Top each chicken breast with 1/4 cup of sauce and sprinkle mozzarella cheese on top. Transfer to oven and bake at 350° for 30 minutes. Save remaining sauce to serve with the baked chicken dish and cooked spaghetti noodles.

Happy V-Day to all! Time permitting, I will manage to make more than one suggestion this week.

Wednesday, November 30, 2011

Pan Fried Pork Chops

Let’s face it: There’s no right or wrong way to make pork chops. The bottom line, really, is to make sure they’re cooked all the way through (because unlike beef steaks, pork chops aren’t best served while on the verge of being raw in the middle. Some of us learned this the hard way in our earlier days – or was that just me?). As many of us tend to do after undercooking meat, I went to the other extreme and had to learn yet another hard truth: that pork chops don't need to be the texture of car tires, either. It is okay for them to be a little - just a little - pink in the center. Pale, light, "Congratulations on your Baby Girl" balloon pink.

Back to that “right way” thing: Pork chops can be baked, fried, braised, pan seared or barbequed...no method is really superior over another; it’s just a matter of preference. This recipe is technically most similar to fried pork chops, although if you shake off the excess flour enough so that the chops are only coated with a thin, thin dusting, it’s not entirely unlike pan seared pork chops either. These pork chops, like all pork chops, are great served with a dollop of homemade applesauce on top, or with heaps of homemade gravy. I give you:

Pan Fried Pork Chops

1 lb. (about 4) boneless pork chops
1 cup flour
2 tsp. seasoned salt
Oil for frying
2 tbs. butter

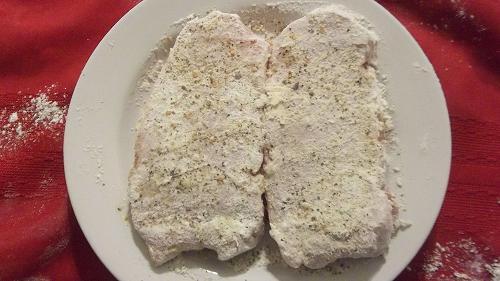
Place flour on a pie pan or plate. Immerse pork chops in flour and dredge to coat them. Remove pork chops, shake off excess flour and sprinkle with seasoned salt on both sides. Set pork chops aside. 

Cover a skillet with a shallow layer of oil and add butter, melting over medium high heat. When the butter is melted, place pork chops in skillet. Cook at medium high heat for five minutes on each side. Remove chops from skillet and serve immediately; reserve pan drippings for gravy if desired. 

Pork Chop Gravy
Reserved pan drippings in skillet
3 tbs. flour
1 cup beef stock 
Salt and pepper to taste

While pan drippings are still hot, add flour and stir to make a roux. When mixture is combined, quickly pour in stock. Cook and stir over high heat until thickened and bubbly. Reduce heat to low and simmer for two minutes, stirring to continue thickening. Taste to determine if salt and/or pepper is needed. Serve hot over pork chops.    

Monday, November 28, 2011

How to Get Meat off the Bone

Life’s too short to waste good meat! If you have a leftover turkey or chicken carcass, a pork shoulder or a bone-in cut of beef, getting meat off the bone is easier than it looks. Here’s what to do:

Preheat the oven to 300 degrees.
Place carcass in a roasting pan.
Cover bottom of the pan with water (1-2 cups).
Cover pan with lid or foil.
Roast the carcass for 1-2 hours or until tender.

Then, remove the pan and use a large fork/knife or tongs to easily shred the meat off the bone. Use the meat for soup, casseroles or other recipes. Getting meat off the bone is a great way to make bone-in poultry or red meat stretch beyond one meal.

Ideas for Turkey Leftovers: Beyond the Turkey Sandwich

Thanksgiving is over, and you need some turkey leftover ideas. We could all use a few good alternatives to turkey sandwiches, right? I’m not downplaying the tastiness of the trendy turkey and cranberry roll, but it’s time for something new. Rather than writing out measured recipes for turkey leftovers, I decided to just list a couple in paragraph format (after all, leftovers are informal). My two turkey leftover favorites are:

Turkey stock: Making turkey stock is virtually the same as making homemade chicken stock; just cover the broken turkey carcass with water, add vegetables/aromatics and boil/simmer. Shred the turkey off, then remove the carcass and the veggies. Allow to refrigerate overnight so the fat will be easy to skim off, or patiently skim the fat off while the stock is still hot. Use immediately or store in airtight container or freezer bag and use as needed. 

Turkey hash: If you’ve ever made homemade corned beef hash, you can easily make turkey hash too. Start by shredding the meat off the carcass (here’s the easiest way to get meat off the bone completely). Chop the heck out of the meat, or use your food processor to get a perfect hash meat consistency. Throw some chopped onions and potatoes in a heated skilled over 2 tbs. (more can be added if needed) melted butter. Cook until potatoes are soft and onions are near caramelized. Add the turkey meat, then a little Worschestire, salt and pepper. Spread in a single layer over skillet, brown for 3-4 minutes. Flip and brown the other side. Serve immediately (I eat mine with ketchup; take that, foodie snobs).

Turkey leftovers are an American tradition, but it’s time to give the sandwiches a rest. Try one of these ideas for turkey leftovers while your turkey is still fresh!

Sunday, November 20, 2011

Homemade Buttermilk Biscuits

Homemade biscuits are much easier to accomplish than some of us would like to believe. Making biscuits from scratch is very affordable, too; with just a few low-cost pantry ingredients that you probably already have (and if you don’t, you should!), a batch of homemade buttermilk biscuits can be whipped up in a jif.

Plus, they're versatile; buttermilk biscuits are a great way to enhance breakfast or dinner. Let’s take a moment to reflect on some popular biscuit-based dishes:

  • Ham and biscuits
  • Sausage biscuits
  • Biscuits and gravy
  • Chicken fried steak and biscuits
  • Biscuits and jam
  • Biscuits and honey
  • Dog biscuits (just seeing if you’re paying attention)
I’ve tried several recipes for homemade biscuits, and this one combines two of the most reputable biscuit authorities known to man: 1.) a baking powder biscuits recipe from The Better Homes and Gardens New Cookbook, enhanced by 2.) an oil-coating technique that comes from none other than the legendary Knotts Berry Farm biscuit recipe. Ironically, you may find that this combination produces biscuits that taste like another famous buttermilk biscuit recipe: Kentucky Fried Chicken biscuits. No joke!

One additional technique that rounds out this recipe comes from yours truly. We’ll call it “Flipping a Biscuit.” It exists for the purpose of guaranteeing your biscuits cook to a golden brown on both sides (in other words, it’s the best way to make sure your biscuits don’t burn). Basically, it just entails flipping your biscuits halfway through baking. There aren’t many other homemade biscuit recipes that recommend this, but don’t be fooled: Failing to flip your biscuits can result in burned biscuits, especially if this is your first time. We could all use some good advice for our first time, right?

Here’s my recipe for homemade biscuits:

Homemade Buttermilk Biscuits

4 cups all-purpose flour
2 tablespoons baking powder
1 tsp. salt
2/3 cup shortening (or 5 1/3 tbs. margarine)
1 ½ cups buttermilk 

Preheat oven to 450 degrees. In a medium mixing bowl, stir together flour, baking powder and salt. Using an electric hand mixer, cut in shortening or margarine until mixture resembles course crumbs. Make a well in the center of the dry mixture. Add the buttermilk. Using a fork, stir until moistened.

Gather dough into a ball and knead gently, folding and pressing until smooth (try not to overwork). On a wax paper sheet dusted with flour, roll dough to ½ inch thickness. Cut with a 2” or 2 ½” biscuit cutter. Coat a baking sheet with a shallow layer of vegetable oil (about ½ cup, a little more if you need it to completely coat the surface).

Place biscuits on oiled baking sheet (about an inch apart - do not allow them to touch). Bake for 5 minutes. Remove from oven and use a spatula to quickly flip each biscuit. Return to oven and bake for another 5 minutes. Remove sheet from oven and quickly remove biscuits from sheet to prevent burning. Transfer to plate. Makes 12 biscuits. 

Making biscuits from scratch can be done quickly once you get the hang of it, and it’s a great baking activity for kids to help with too. Also, this recipe can be halved if you’d like. A dozen biscuits is quite a lot for some families; but on the other hand, biscuits at dinner can always mean leftovers for breakfast, and vice versa. Then again, your family may make pigs of themselves eating homemade buttermilk biscuits (like mine). If so, you can always make more tomorrow!

Friday, November 18, 2011

Making Brownies from Scratch

If this is your first time making homemade brownies, prepare to be shocked by how easy it is – and how much better they will be than the box you grew up on. Since I know brownies are one of those desserts that have fans in different camps, I’ll forewarn you: If you want your homemade brownies to be so fudgy that they’re practically unformed (as many boxed brownies are), this isn’t that recipe (but it could be). How so? Keep reading, friends!

This recipe for making brownies from scratch is so easily adaptable that you can adjust it to attain the homemade brownie consistency you’re going for, simply by altering the amount of flour you use. If you just have to have your brownies super-fudgy, you can cut down on the flour in the recipe; but if you're like me, you need something to grab when you're tempted to dip Oreos in your coffee every morning and I assure you, a thick, sturdy brownie that doesn't fall apart when moistened will do the trick. Even if you're in the fudge brownie camp, though: Try making this homemade brownie recipe word-for-word first, and then evaluate whether or not it needs to be adjusted. I will tell you, I’ve tried many homemade brownie recipes on the Web and few are as easily adaptable as this one.

Homemade Brownie Recipe

1 cup (2 sticks) butter or margarine
2 cups sugar
2 teaspoons vanilla extract
4 eggs
3/4 cup dark cocoa powder 
1 cup all-purpose flour
1/2 teaspoon baking powder
1/4 teaspoon salt
1 cup semisweet chocolate chips

Preheat oven to 350°F and grease a 13x9x2-inch baking pan (although there are other sizes that will work well and give you much thicker brownies like in the photo above; if this sounds intriguing, see the tips below). Place butter in microwave-safe bowl and microwave on high for one minute or until melted. Pour melted butter in a large mixing bowl and add sugar and vanilla. Cream butter, sugar and vanilla together with electric mixer. Add eggs and beat in with mixer until combined. Add cocoa, flour, baking powder and salt and beat with mixer for two minutes or until thoroughly blended. Stir in chocolate chips with a spoon. Pour batter into the prepared pan.
Bake for 30-35 minutes. Remove from oven and insert fork in center for doneness (fork should come out clean). Allow brownies to cool in pan for 30 minutes before cutting into bars.

Tips for Making Brownies from Scratch

Maybe it's just me, but I’ve found that day-old brownies almost always taste better. Even if you love the warm-out-of-the-oven brownie variety, try making these a day ahead. You can always re-heat in the microwave for 20 seconds if you want to. You may be pleasantly surprised!

If you own a Perfect Brownie pan, you can easily recognize that the pan in the kit is not 13x9x2 inches. It is actually about 11x7 inches, which is a great size for those who want thicker, sturdier brownies. I plan to post some Perfect Brownie tips soon, because this is a great tool for making homemade brownies if you know how to manipulate it (in other words, don’t bother following the instructions for use). Another pan that works well with this homemade brownie recipe is an 8x8 inch square baking pan, especially if it’s a silicone one because it makes removing your homemade brownies a veritable breeze. 

Making brownies from scratch is an arrow you want in your quiver for those moments when you want to be on your A-game as a cook: the sleepover, the soccer party, the church social or the silly gathering also known as your husband’s fantasy football draft. Everyone loves brownies, but because they’re accustomed to convenience products, they may not know how much they love homemade brownies until they try yours – and how gratifying is that?